-1.png?height=120&name=Boutir%20new%20logo%20(White)-1.png)
This article provides a step-by-step guide on how to set up a Google Analytics GA-4 account.
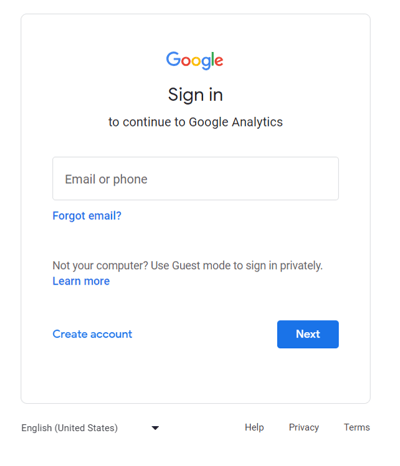
STEP 1 : Visit the Google Analytics website (https://analytics.google.com) to log in with your Google or Gmail account.
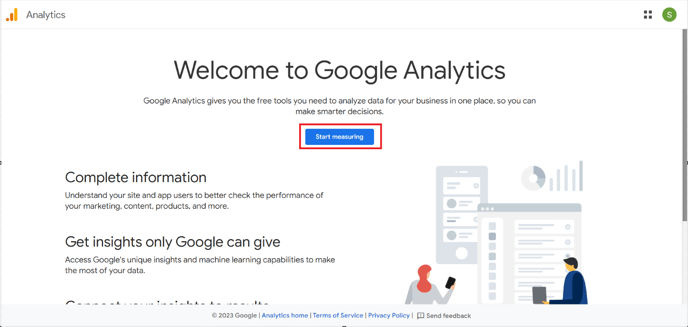
STEP 2 : Start registering by clicking the "Start measuring" button.
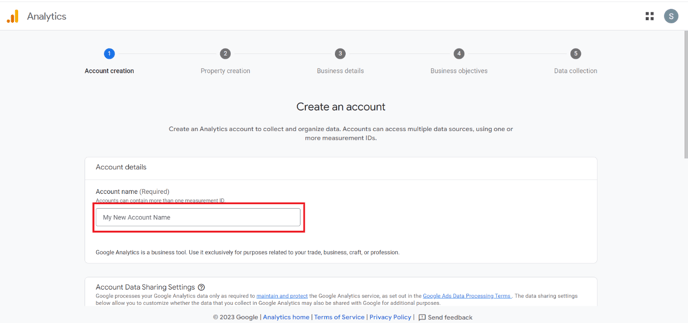
STEP 3 : On the "Account Settings" page, input an account name, like your personal name or your shop's name for easy identification, then click "Next".
STEP 4 : The system automatically sets up GA4 resources. Enter a “Property Name” and choose your report's time zone and currency. You can later edit these settings in "Management." Click "Next" to proceed.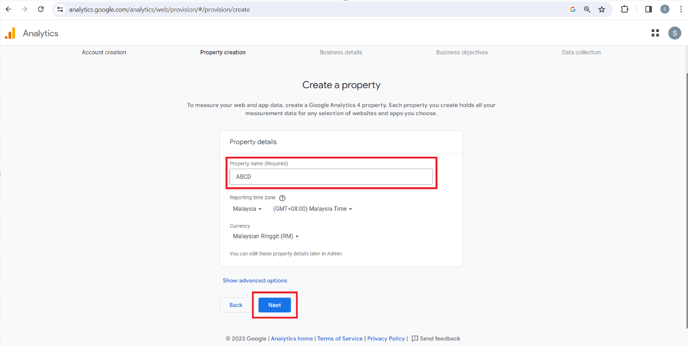
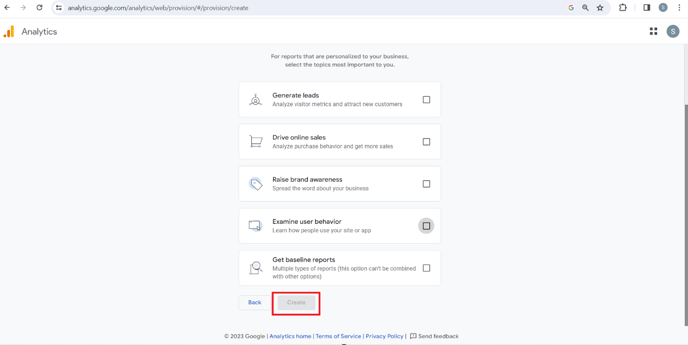
STEP 5 : Choose the industry category and business scale that match your business, then click “Next”. For GA4, provide merchant-related information and click "Create."

STEP 6 : Select the GA4 option that says "Provide merchant-related information" and then click "Create".
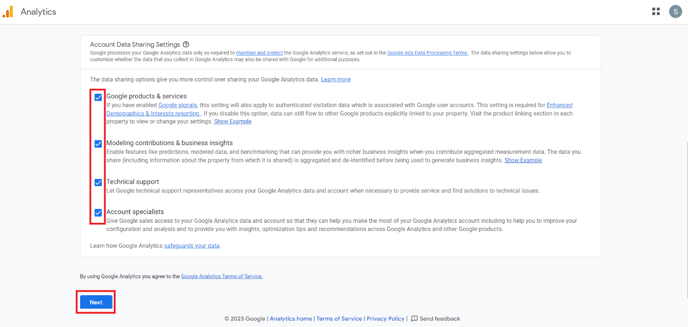
STEP 7 : Choose your location from the upper left corner, agree to Google Analytics' terms of service, and click "I accept".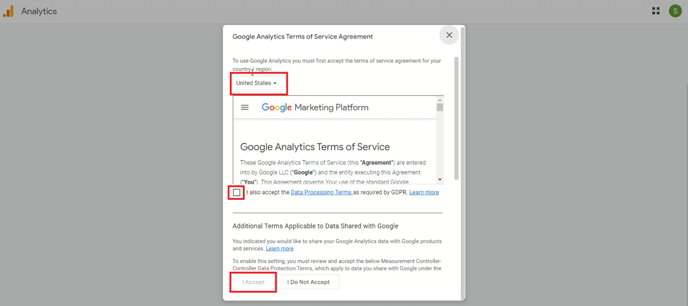
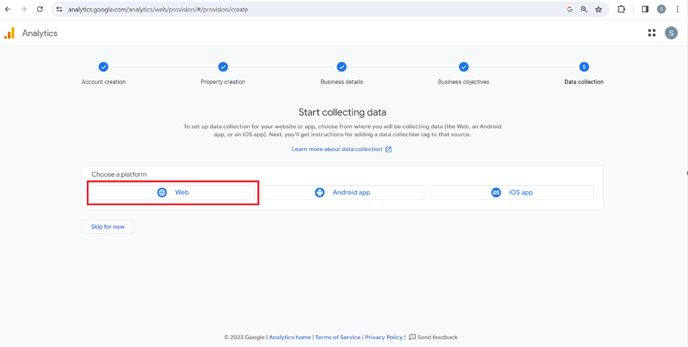
STEP 8 : Once you've set up your account and GA4 resources, click on "Web" on the next page.
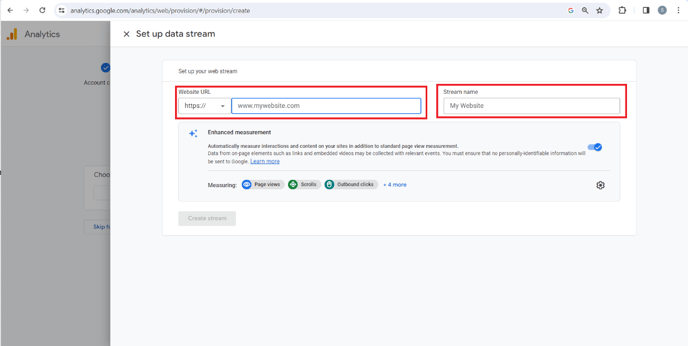
STEP 9 : Enter your online shop URL and stream name, then click "Create Stream"
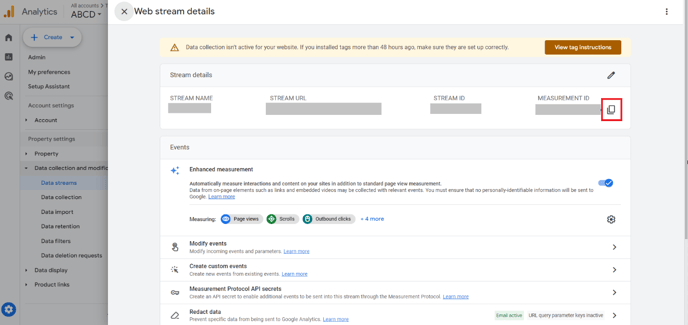
STEP 10 : After the stream is established, please check the location of the ID and click Copy.
Congratulation! Now you had done set up your Google Analytics GA-4 account.
You may also looking for: