How to Add Hashtags via Boutir Admin?
- Login to Boutir Admin (https://www.boutir.com/business)
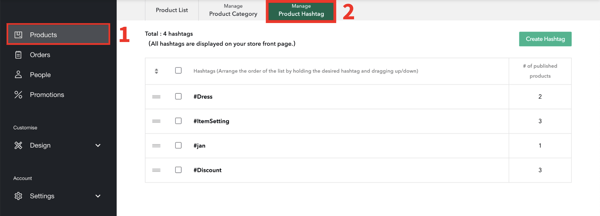
- Go to the “Products” sidebar > “Manage Product Hashtag”. This page allows you to easily see and manage all hashtags as well as the products that are under that particular hashtag.

- To create a new hashtag, click “Create Hashtag” > input the name of the hashtag > select the products you’d like to be under that hashtag > click “Confirm and create”

4. You can also add a hashtag directly through the product page of each product. To do so, click on the “Products” sidebar > “Product List” > select the particular product you want in order to edit it. You can also click “Create Product” to add a new product

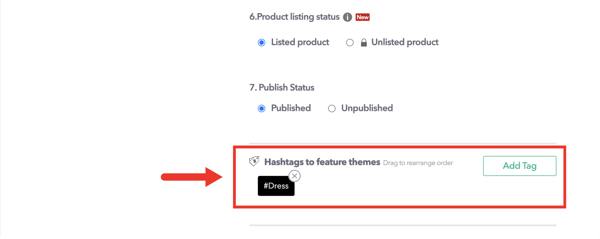
5. Once you’re on the “Edit Product” page, scroll down to find “Hashtags to feature themes” > “Add Tag”

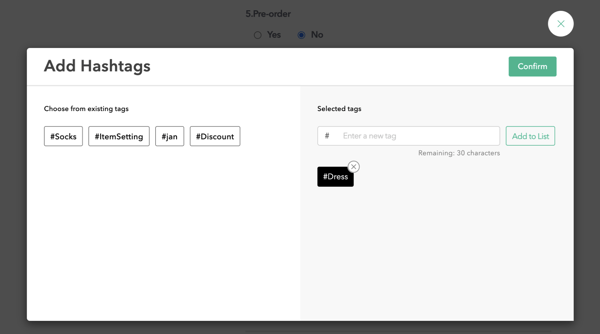
6. Add new hashtags or choose from existing tags. If you created a new hashtag, click “Add to List”. Once done, click “Confirm”

Note:
- There is no limit to the total number of hashtags that can be put or the number of hashtags that can be added to each product.
- This hashtag feature does not support the feature of uploading products using CSV.
- This hashtag feature can only be managed through Boutir Admin, and not on Boutir App
How Customers Can Make Use of Hashtags?
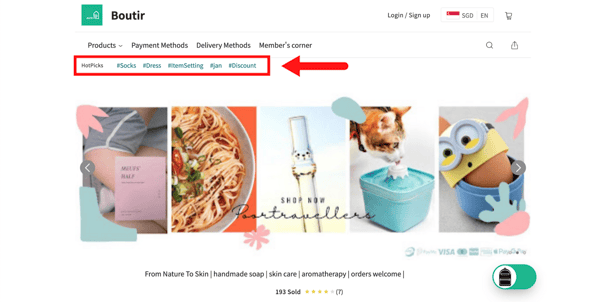
- Hashtags will appear as HotPicks on the store front

- When customer clicks on the desired hashtag, the online store page will only display the products with the Hashtag added
*Each item can add more than 1 Hashtag
(This tutorial is for reference only. If there is any update on the feature, its latest version shall prevail.*)
-1.png?height=120&name=Boutir%20new%20logo%20(White)-1.png)